1.
Getting Ready
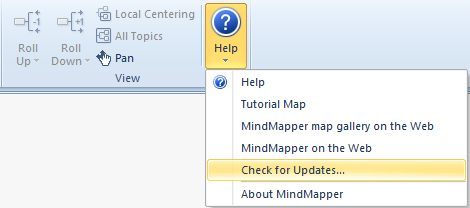
① Updating MindMapper
-
MindMapper Collaboration Service requires MindMapper 14 Arena.
-
You can update to the latest MindMapper build by going to the Help menu then
choosing Check for Updates.
-
You can verify if your MindMapper 14 Arena can use the Collaboration Services
by looking at your menu.
-
If your menu contains the Collaboration tab, then your product is ready.

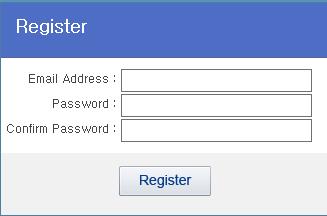
② Create an Account
- You must create an
account before using the service.
- Please click Register on
top right of the Arena main page.
- Or you can go to our
website www.mindmapper.com and click
Login then click Register to create a new account.
Note: If you have already
created an account for our previous online storage Web Folder,
then you do not need to create
another account.
2.
Create a New Collaboration Session
-
To create a new meeting, click the New command in the
Session group.

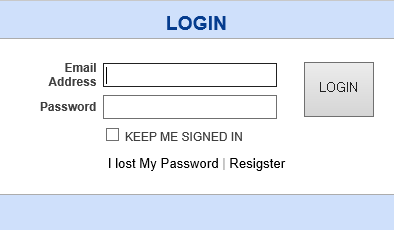
-
You’ll be prompted to login.
- After logging in, you will see Arena window appear. In
order to start a new collaboration click on New.
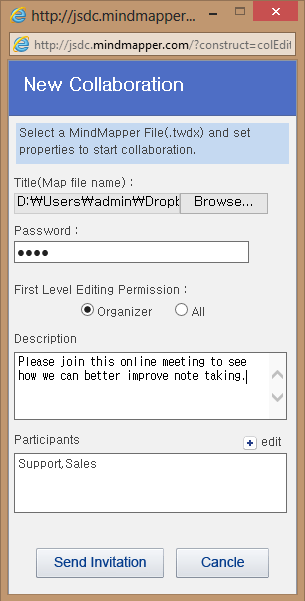
- New Collaboration window will appear
with Title, Password (optional), First Level Editing Permission, Description,
Participants.
- Fill out the information and click Send Invitation.
3.
Collaboration Meeting Email
When the meeting
information is filled out, Send Invitation has been clicked, the collaboration
emails will be sent to all participants.
The invitation email will contain information such as:
· Collaboration File Name
· Organizer
· Date
· Meeting Description
The Meeting email will also
contain a link to join the meeting.
The participants need to
simply click this button to join a meeting.
4.
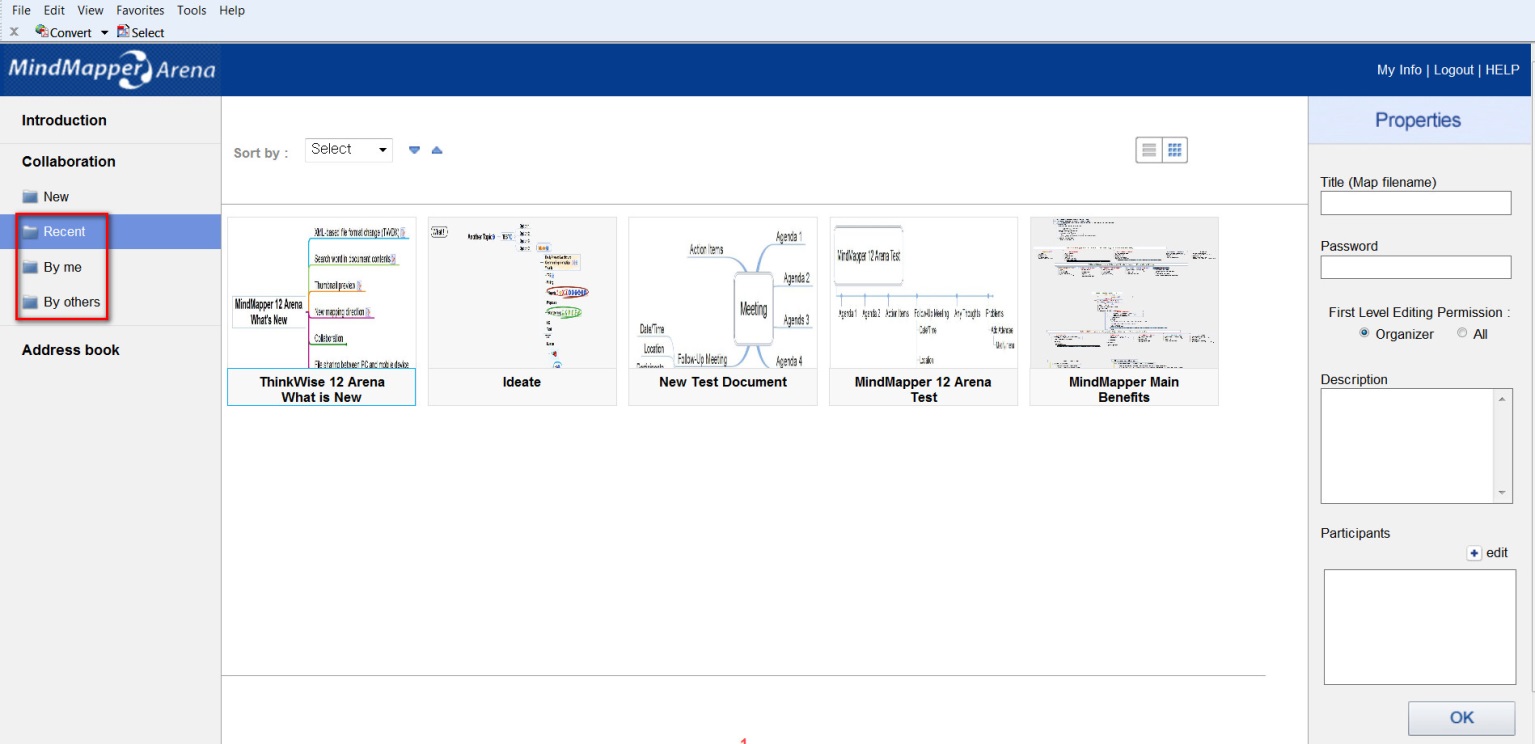
Arena Site Menu Explained
Collaboration Menu
|
|
A.
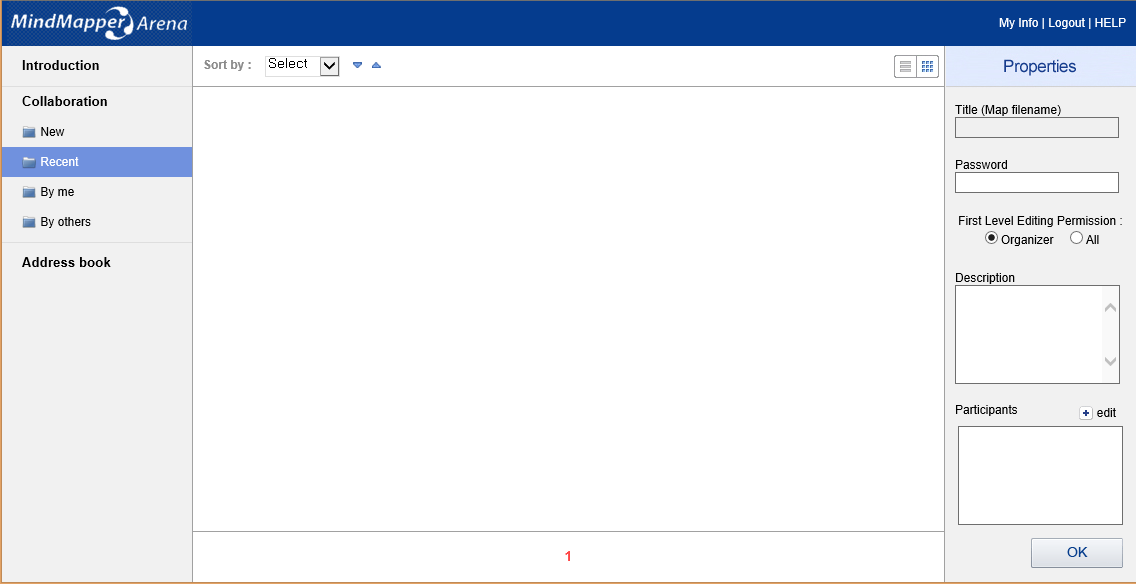
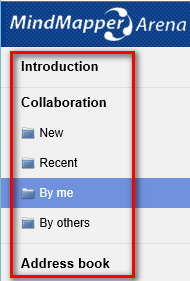
New: Browse your local computer and
upload TWDX file you want to share with others. B.
Recent: List of most recent files
you have worked on. C.
By me: List of files you have
shared. You are the organizer of
the meeting. D.
By others: List of files others have
shared with you. You are the
participant of the meeting. E.
Address book: List of contacts by
individuals or groups. |
|
|
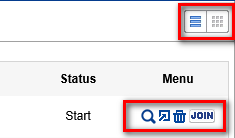
F.
Image view: Click this button to see
the preview of the file. G.
Post: You can post your map to
social media outlets or message boards.
Simply past the HTML source code and input it to any outlets that
allows direct HTML input. If not,
you can still copy the map link and paste it to social media outlets or
message boards. Anyone who clicks
on the link will be able to see the map in Flash viewer. I.
You can view your maps in thumbnail or list. |
5.
Join a Meeting
For
Account Holders
- Start MindMapper and
click Join in the Session group
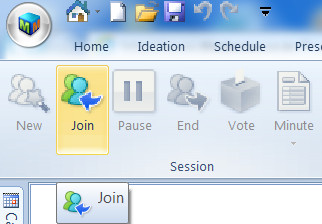
- You’ll be prompted to
login.
- Select a file from Recent
menu, or from
files shared by you (By me menu), or from files shared by others (By others
menu) and click Join.